Technical Verification Guide
Assessing Light Gaps After Blackout Shade Installation
Understand why blackout fabric can still show light at edges and collect the mounting, geometry, channel and exposure evidence needed for review.
Direct answer
What should the buyer do?
Blackout fabric controls transmission through the fabric; it does not automatically eliminate light around hardware, edges, sill or headbox. Evaluate the complete opening and installation under documented lighting and camera conditions. Do not apply a universal acceptable gap tolerance.
Why this matters
Edge light can come from mounting choice, opening geometry, fabric-to-hardware width, missing or misaligned channels, cassette/sill details, layer overlap or uneven finishes. Camera exposure can exaggerate or hide the condition.
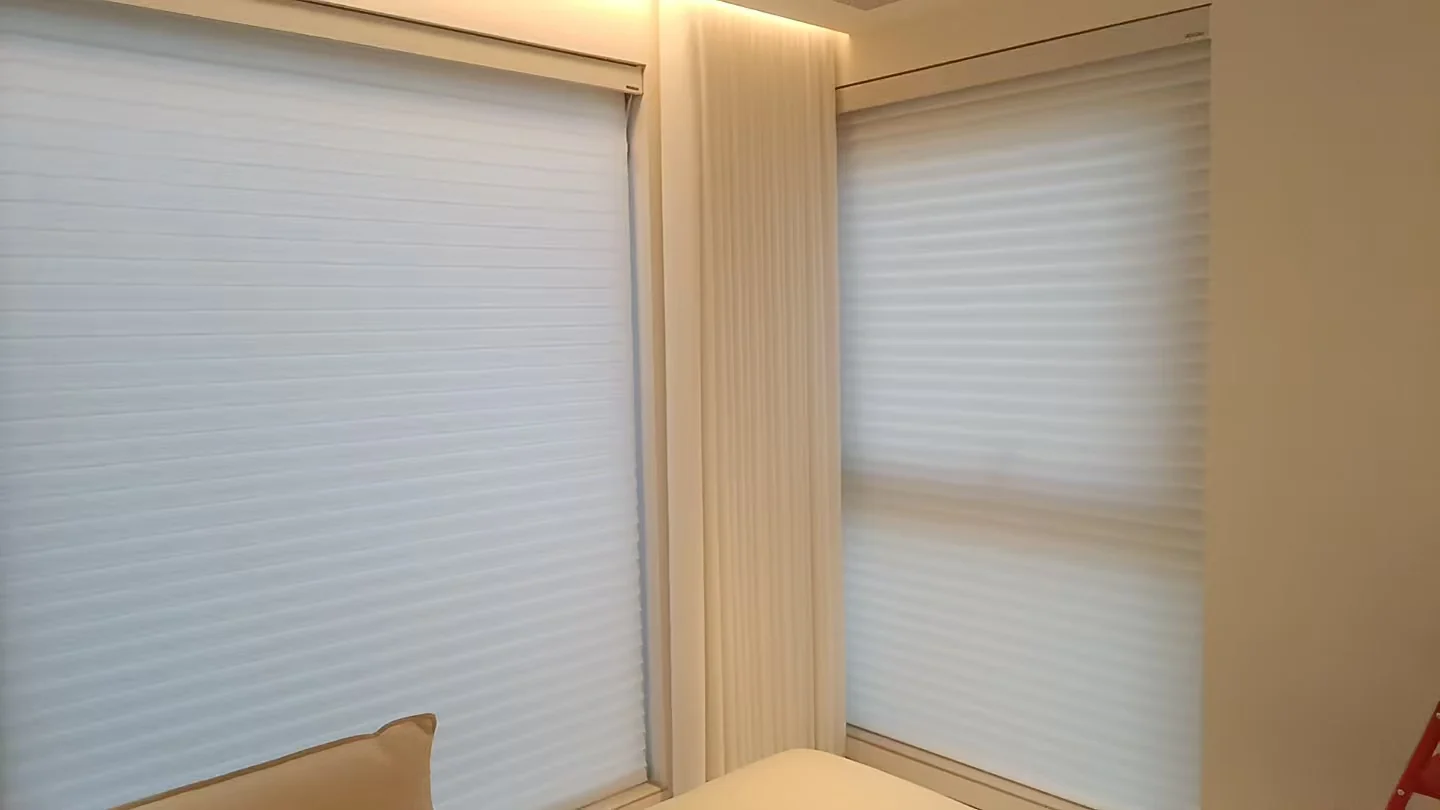
Assessing Light Gaps After Blackout Shade Installation
| Factor | Evidence to collect | Review question |
|---|---|---|
| Mounting type | Inside/outside mount and section | Was the expected edge condition defined? |
| Opening geometry | Top/middle/bottom measurements and irregularity | Does geometry change coverage? |
| Fabric / hardware width | Fabric and overall system widths | Where is the designed clearance? |
| Side channels | Type, dimensions and alignment photos | Are channels included and installed as selected? |
| Headbox / sill | Cassette, bottom detail and interfaces | Where can light pass? |
| Lighting / camera | Time, room lights and fixed exposure views | Is comparison consistent? |
Information to collect
- Front and both side photos
- Opening measurements
- Selected system and mounting type
- Fabric/hardware widths
- Side-channel and headbox details
- Lighting and camera conditions
What Saiwenna can review
Saiwenna can compare the evidence with the selected system information and identify questions for installer, designer or project reviewer. Acceptance remains project-defined.
No universal zero-gap promise or tolerance is provided. The image is an anonymous installed edge-condition reference, not an accepted hotel mock-up.
Technical Verification Guide
Technical Verification Guide — compare repeatable views and dimensions before assigning cause or acceptance.
Light-Gap Review Decision Path
- Confirm mounting and selected hardware.
- Record repeatable front and edge views.
- Separate geometry, alignment and designed-clearance questions.
- Apply only project-defined acceptance criteria.
Light-Gap Review Decision Path
- Confirm mounting and selected hardware.
- Record repeatable front and edge views.
- Separate geometry, alignment and designed-clearance questions.
- Apply only project-defined acceptance criteria.
Related project resources
Send a reviewable project brief
Send the current records, selected product information and unresolved decisions. Do not send passwords, private network credentials or unnecessary personal data.